一、背景 随着公司的产品项目活动的增加,活动进行过程中都需要用到大量定时器。为了能方便快捷的控制定时器的启动、执行和关闭,我们弃用了 Spring Boot 中自带的 @Scheduled 注解,采用开发、配置和操作更为灵活的 XXL-JOB。
二、介绍 2.1 简单介绍 XXL-JOB 是一个分布式任务调度平台,其核心设计目标是开发迅速、学习简单、轻量级、易扩展。现已开放源代码并接入多家公司线上产品线,开箱即用。
其特性非常丰富:
简单:支持通过Web页面对任务进行CRUD操作,操作简单,一分钟上手; 动态:支持动态修改任务状态、启动/停止任务,以及终止运行中任务,即时生效; 调度中心HA(中心式):调度采用中心式设计,“调度中心”自研调度组件并支持集群部署,可保证调度中心HA; 执行器HA(分布式):任务分布式执行,任务”执行器”支持集群部署,可保证任务执行HA; 注册中心: 执行器会周期性自动注册任务, 调度中心将会自动发现注册的任务并触发执行。同时,也支持手动录入执行器地址; ...... 2.2 架构
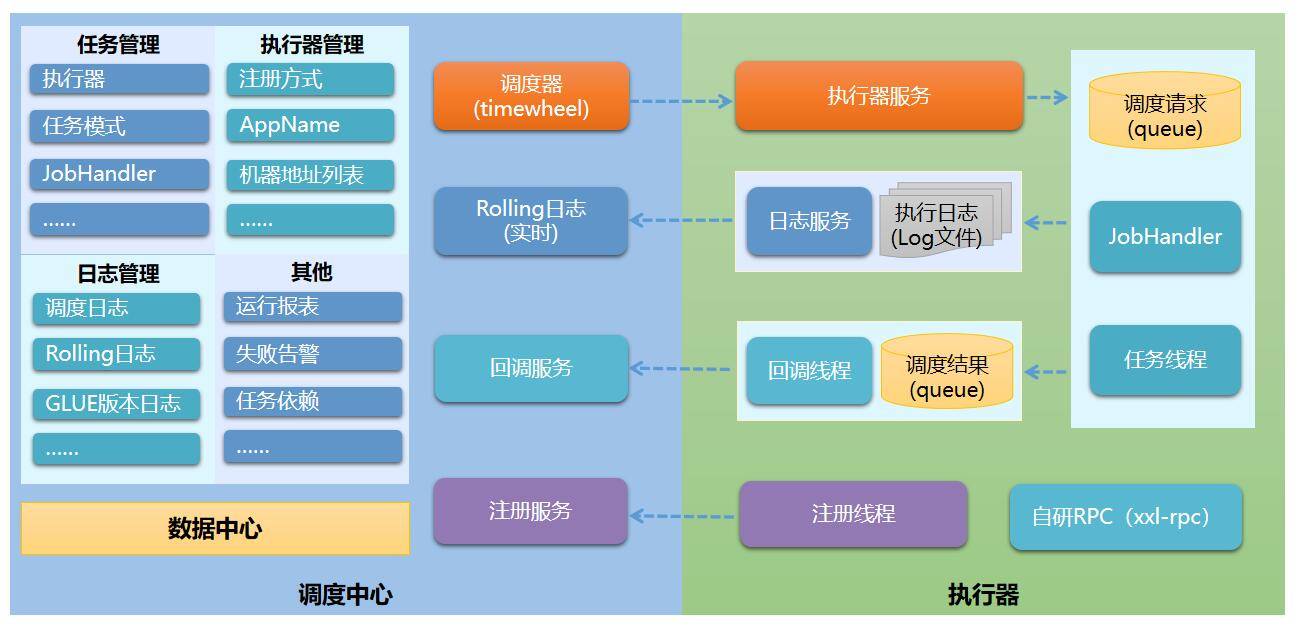
从图中可知,XXL-JOB 架构大致分为2部分:调度中心和执行器。
三、实战 3.1 下载 1 git clone https://github.com/xuxueli/xxl-job.git
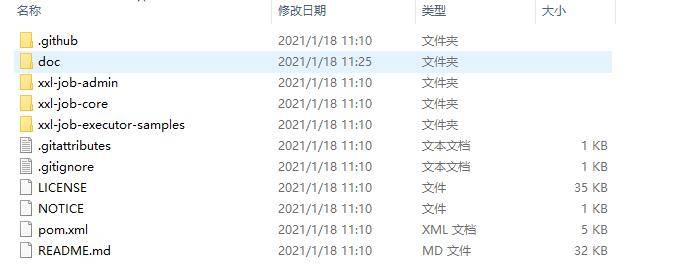
下载后其文件目录如下图:
官方已经提供完整的案例:
xxl-job-admin 是任务调度中心项目。生产环境中,我们可以直接使用其源码,打包部署。
xxl-job-executor-samples 是执行器的案例项目,实际开发中需要整合其配置文件到我们自己的项目中使用。
xxl-job-core 为核心项目,调度中心和执行器项目都需要依赖它。
3.2 导入数据 我们在 xxl-job\doc\ db 目录,里边有个名为 tables_xxl_job.sql 文件。
我们需要在数据库实例中创建名为 xxl_job 的数据库,将上边的 sql 文件在此数据库中执行。
3.3 启动调度中心 用 IDEA 打开 xxl-job 项目,选中 xxl-job-admin 子项目,对 application.properties 进行修改:
1
2
3
4
5
6
7
8
9
### web server.port=8080 server.servlet.context-path=/xxl-job-admin ### xxl-job, datasource spring.datasource.url=jdbc:mysql://127.0.0.1:3306/xxl_job?useUnicode=true&characterEncoding=UTF-8&autoReconnect=true&serverTimezone=Asia/Shanghai spring.datasource.username=root spring.datasource.password=tiger spring.datasource.driver-class-name=com.mysql.cj.jdbc.Driver
配置文件还有很多配置,此处我们只修改数据库连接配置,然后运行项目。
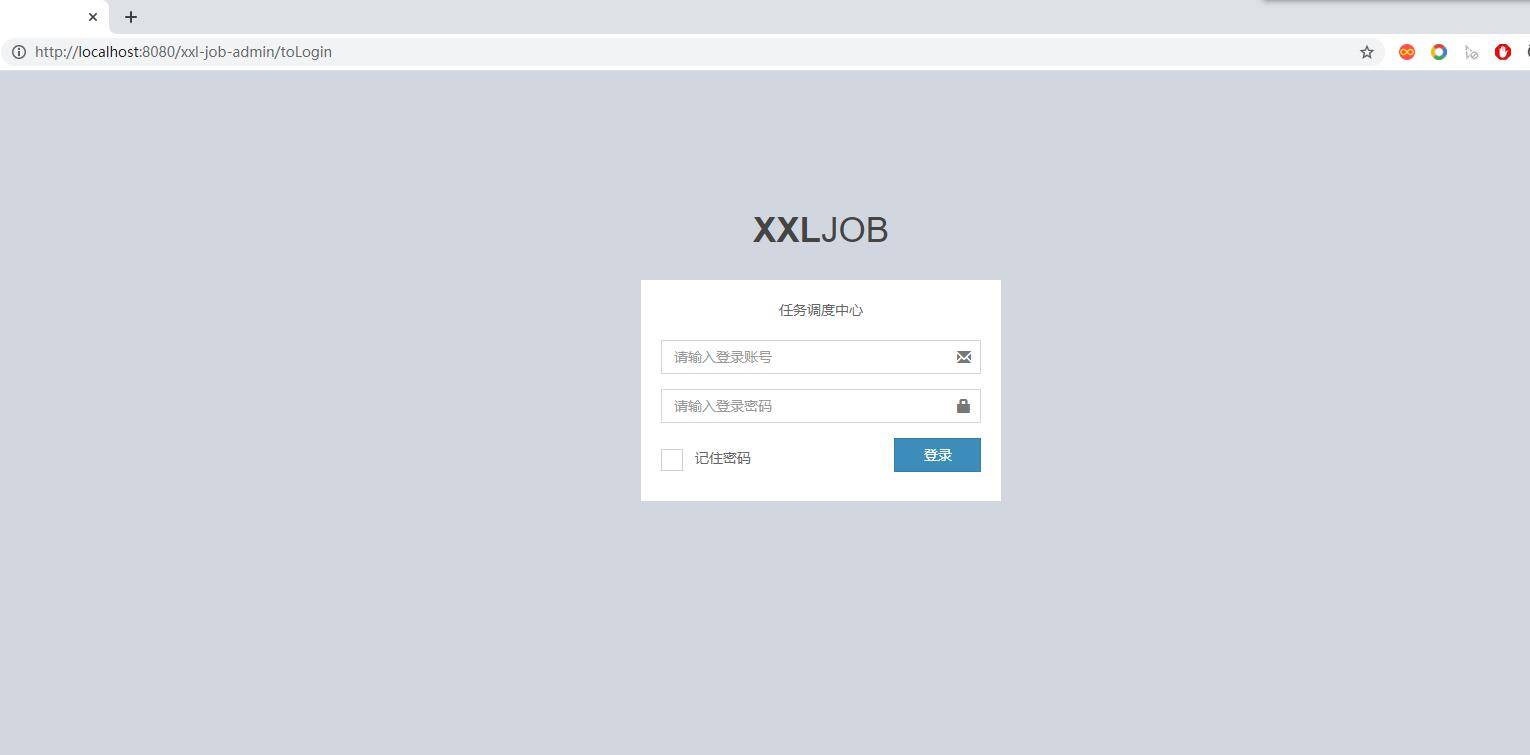
打开浏览器访问 http://localhost:8080/xxl-job-admin , 如下图:
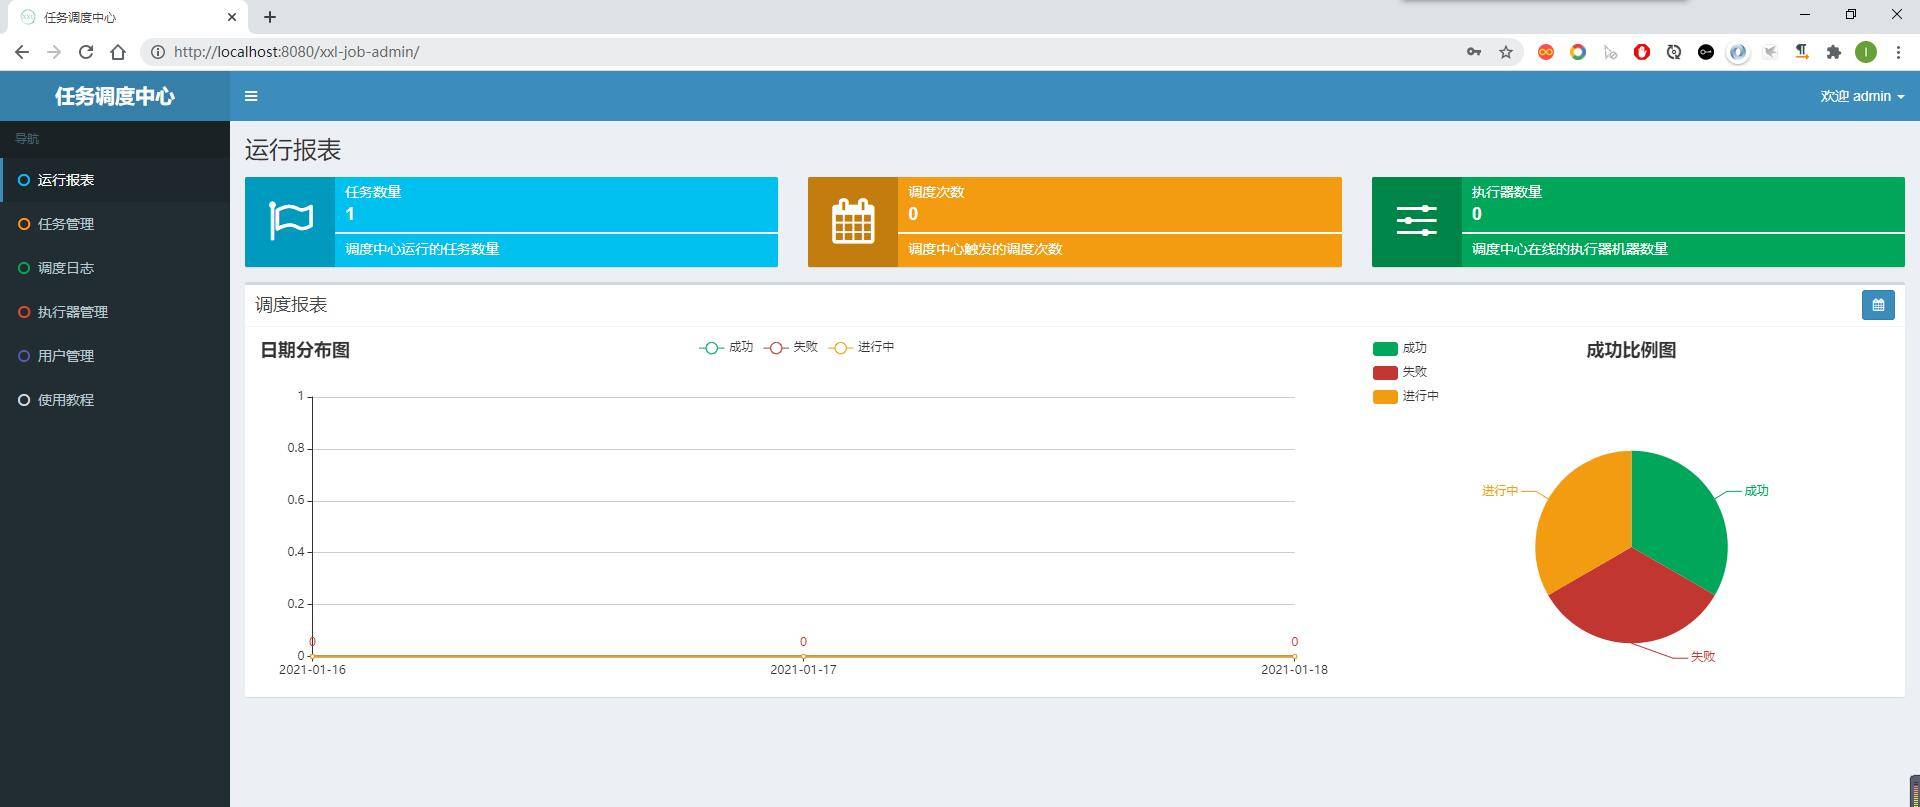
默认登录账号 “admin/123456”,登录后如下图:
3.4 任务执行器 执行器项目的演示,笔者采用实际开发流程方式,即手动新建和配置执行器项目。
第一步,在搭建执行器项目之前,我们需要将 xxl-job-core 源码打包到本地 Maven 仓库。然后新建 Spring Boot 项目,我们命名为 job-demo 。
项目依赖包如下:
1
2
3
4
5
6
7
8
9
10
11
12
13
14
15
16
<dependency> <groupId>org.springframework.boot</groupId> <artifactId>spring-boot-starter-web</artifactId> </dependency> <dependency> <groupId>org.springframework.boot</groupId> <artifactId>spring-boot-starter-test</artifactId> <scope>test</scope> </dependency> <dependency> <groupId>com.xuxueli</groupId> <artifactId>xxl-job-core</artifactId> <version>2.3.0-SNAPSHOT</version> </dependency>
注意:xxl-job-core 就是刚才打包好的 jar 依赖,当然我们也可以使用远程 Maven 仓库的依赖!
第二步,我们需要配置 application.properties 文件和 logback.xml 两个文件(从 xxl-job-executor-sample-springboot 复制过来即可):
1
2
3
4
5
6
7
8
9
10
11
12
13
14
15
16
17
18
19
20
21
22
23
24
25
26
27
28
29
30
# web port server.port=8081 # no web #spring.main.web-environment=false # log config logging.config=classpath:logback.xml ### xxl-job admin address list, such as "http://address" or "http://address01,http://address02" xxl.job.admin.addresses=http://127.0.0.1:8080/xxl-job-admin ### xxl-job, access token xxl.job.accessToken= ### xxl-job executor appname xxl.job.executor.appname=job-demo ### xxl-job executor registry-address: default use address to registry , otherwise use ip:port if address is null xxl.job.executor.address= ### xxl-job executor server-info xxl.job.executor.ip= xxl.job.executor.port=9999 ### xxl-job executor log-path xxl.job.executor.logpath=/data/applogs/xxl-job/jobhandler ### xxl-job executor log-retention-days xxl.job.executor.logretentiondays=30
由于我们是用同一台机器测试,因此我们只需修改 xxl.job.executor.appname,由于只是演示,日志的文件路径就不修改了。
第三步,配置 XXL-JOB 执行器组件,用于读取 application.properties 中的配置数据:
1
2
3
4
5
6
7
8
9
10
11
12
13
14
15
16
17
18
19
20
21
22
23
24
25
26
27
28
29
30
31
32
33
34
35
36
37
38
39
40
41
42
43
44
45
46
@Configuration public class XxlJobConfig { private Logger logger = LoggerFactory.getLogger(XxlJobConfig.class); @Value("${xxl.job.admin.addresses}") private String adminAddresses; @Value("${xxl.job.accessToken}") private String accessToken; @Value("${xxl.job.executor.appname}") private String appname; @Value("${xxl.job.executor.address}") private String address; @Value("${xxl.job.executor.ip}") private String ip; @Value("${xxl.job.executor.port}") private int port; @Value("${xxl.job.executor.logpath}") private String logPath; @Value("${xxl.job.executor.logretentiondays}") private int logRetentionDays; @Bean public XxlJobSpringExecutor xxlJobExecutor() { logger.info(">>>>>>>>>>> xxl-job config init."); XxlJobSpringExecutor xxlJobSpringExecutor = new XxlJobSpringExecutor(); xxlJobSpringExecutor.setAdminAddresses(adminAddresses); xxlJobSpringExecutor.setAppname(appname); xxlJobSpringExecutor.setAddress(address); xxlJobSpringExecutor.setIp(ip); xxlJobSpringExecutor.setPort(port); xxlJobSpringExecutor.setAccessToken(accessToken); xxlJobSpringExecutor.setLogPath(logPath); xxlJobSpringExecutor.setLogRetentionDays(logRetentionDays); return xxlJobSpringExecutor; } }
第四步,编写定时任务,即项目中的业务代码:
1
2
3
4
5
6
7
8
9
10
11
12
13
14
15
16
17
18
19
20
21
22
@Component public class MyTask { /** * @XxlJob 中 value 值唯一即可 * @param param * @return */ @XxlJob("firstTask") public ReturnT<String> firstTask(String param) { XxlJobHelper.log("start firstTask param = {}", param); // 业务代码,此处作为演示只打印 hello xxl-job System.out.println("hello xxl-job"); XxlJobHelper.log("end firstTask"); return ReturnT.SUCCESS; } }
定时器类中,方法必须有 String 类型的入参,返回值必须是 ReturnT<String>,否则启动项目会报错。最后需要使用 @XxlJob 注解,否则调度中心无法调度该任务。
最后启动执行器项目。
3.5 配置定时任务 调度中心和执行器项目都启动了,我们如何将两者关联起来呢?很简单,我们来到 XXL-JOB 调度中心的管理界面。
第一步,点击 “执行器管理”,新增执行器:
第二步,点击 “任务管理”,新增任务:
我们设置每 5 秒执行一次任务。
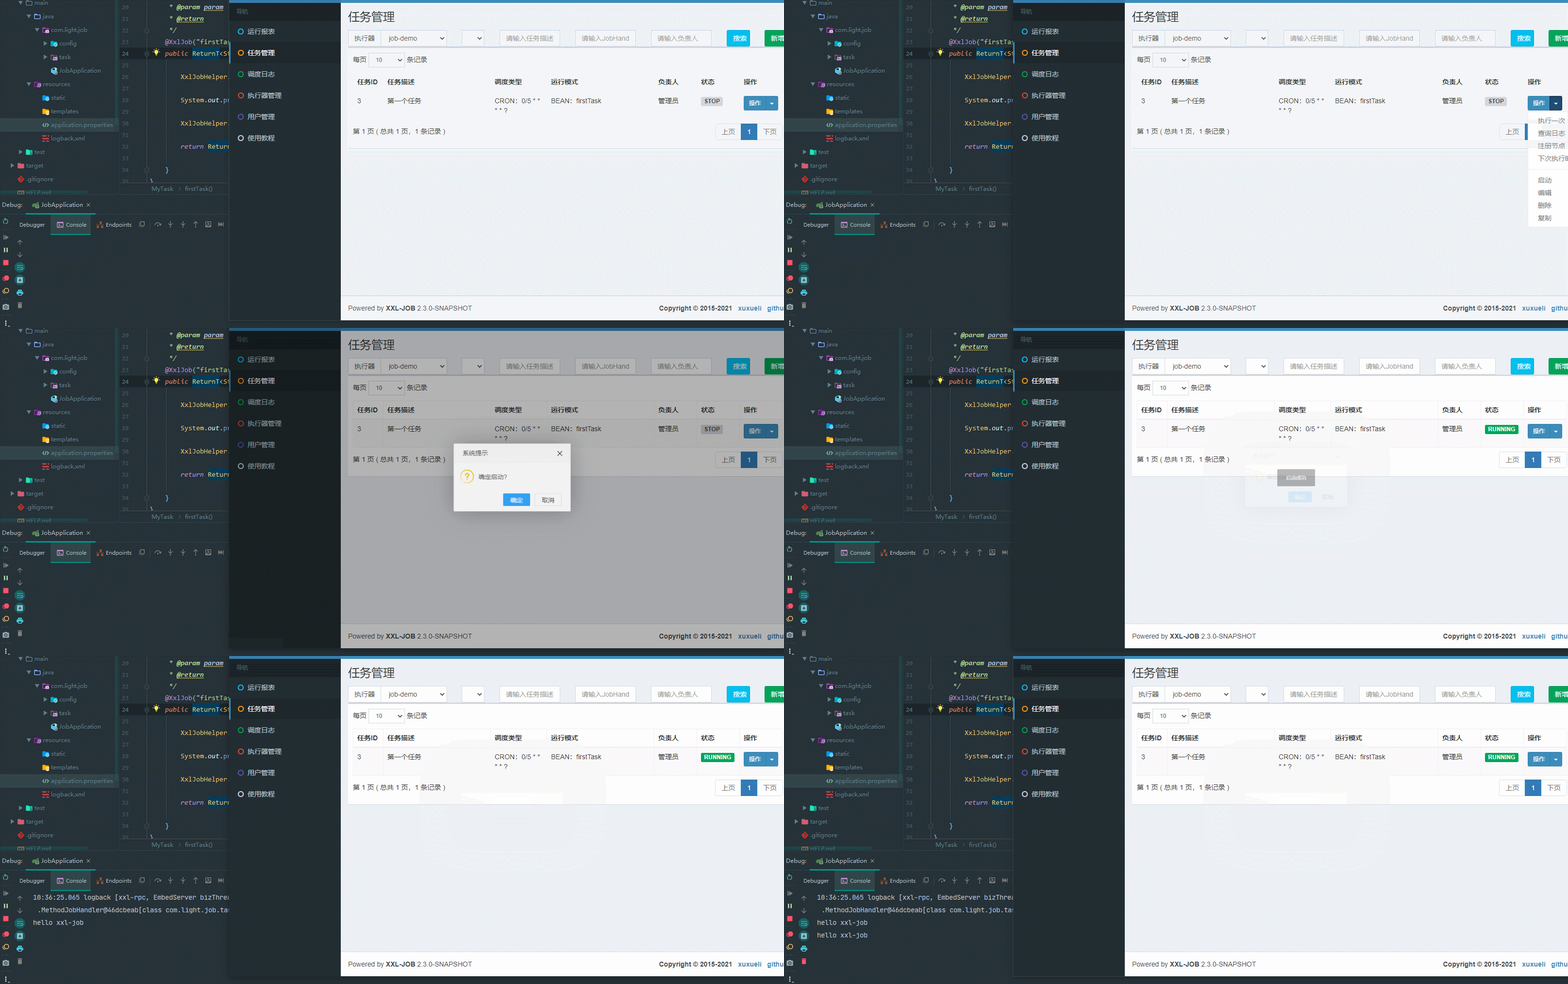
第三步,新增任务成功后,任务列表会出现新增的记录,点击启动:
执行器项目的控制台打印了 “hello xxl-job”,通过操作调度中心,成功启动和执行定时器任务。
本次演示只是粗浅的使用 XXL-JOB 功能,我们还可以在后台管理界面查看任务每次执行的日志等,更多详细资料可参考下文的链接。
四、参考文档 XXL 开源社区

